If you are considering preordering meat chickens with us, make your reservation soon. We are taking deposits for the first batch of 50 Freedom Ranger broilers. After we subtract the ones for ourselves, only 14 birds have not yet been reserved. The first batch will be harvested approximately July 7/8. Email us if you want a reservation.
Category Archives: chicken
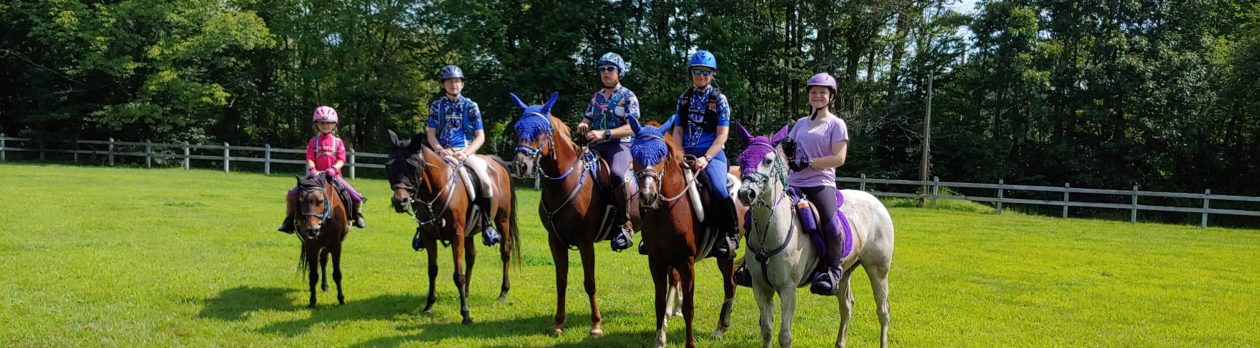
Chicken Tractor, Sawyer style
For those of you not into the grow your own meat movement, a chicken tractor is a moveable chicken pen. It is intended to be moved daily to allow the chickens access to grass and bugs while providing shelter at night and protection from predators. We needed a chicken tractor to house chickens as they grow to be replacement hens, roosters for meat, and our upcoming order of broilers. For now, we have only built 1 tractor to decide what we do and don’t like about it. There are many common designs, and probably the most notable is Joel Salatin’s design.
Our chicken tractor is made entirely out of red oak. Now you might be wondering why I would make a chicken pen out of red oak, and it’s a very simple answer: mahogany would have been ridiculous and maple shows the dirt too much. Seriously, I just had a lot of extra red oak on hand and it made more sense to use excess wood I have than to spend money on new pine. I also had 6′ 2″x4″ field fencing, so that is what I used for the sides. I built the tractor 8′ wide and 12′ long. I specifically chose 8′ (instead of the common 10′) because if we move or I decide to sell this version, it is still small enough to be transported on a flatbed trailer.
What makes this Sawyer Style, it the recycling. The total cash expended on this project was $25 for the 2 wheels and 2 door hinges. Everything else was stuff we already had here on the farm with no predetermined purpose. Sure, at some point I bought the red oak, but it was almost firewood, so I might as well use it in a project.
We did put a roof made of OSB to give the birds shelter. The sides under the roof will be finished in using feed bags to provide wind shelter. We will still add a waterer and feeder that can be accessed from outside the fencing. We also put roosts into the back of the tractor in the sheltered area in order to give the birds somewhere to get off the ground. Hopefully, that will keep them healthier and minimize the chance of a predator pulling them out from under the edge.
A few immediate observations of what we don’t really like.
1. The only access is from the 4′ wide door in the front. You have to get down on the ground to get inside. I think that will get old in bad weather.
2. The extra support frame at the divider between the shelter and open areas is a death trap for the chickens. When pulling the tractor on the ground, the birds tend to stay towards the middle. Unfortunately, that cross-bar is in a perfect spot to trap chicken legs and cause injuries. I may have to cut it out.
3. Red oak makes a heavy tractor. I did include wheels on the back, but it’s heavy. On the positive side, it is definitely sturdy.
Here are some pictures. The tractor was put to use this afternoon with 38 birds we are raising that are 8-9.5 weeks old. If you are thinking about building your own, come on over and take a look.


Getting some broilers
Anna and I have debated many times the advantages and disadvantages of what to raise for a meat chicken. In the end, our primary concern is that we are raising a healthy chicken for our family to eat. We are offering some extra birds for sale, but based on the time committment to process the chickens (and raise them) we do not anticipate raising hundreds of chickens at a time. So, despite some previous discussions and plans, we have decided to order Freedom Rangers. One significant advantage of this bird is we can keep some for our own breeding stock if we want. The first batch of chickens will get processed in late June or early July.
Hard boiled eggs
So I think we’ve found the answer to having hard boiled eggs from our farm fresh eggs without sticking them in the back of the fridge for a week or two. Apparently steaming them instead of boiling and then immediately dunking them in ice water works wonders. The ice water should have plenty of ice in it to stay cold. Yeah no more sticky shells!
Meat chickens
In addition to using eggs, we decided to try our hand at processing our chickens for meat. In 2011, we processed 42 chickens for our family in the late summer and early fall. At the time, we rented a plucker to remove the feathers. Since then, we have built our own plucker. It takes us about 10 minutes on average to go from a live bird to a shrink-wrapped product for the freezer.
This year, we will offer meat chickens for sale to others. We raise excess dual purpose breed roosters for meat. While there are a number of meat specific breeds available, most notably the cornish cross, we choose to stick with heritage, natural breeds that can be reproduced on our farm. There are no risks of broken legs from excessive growth, heart attack from overeating, etc. It takes 4-5 months to raise a rooster for harvest, and that will result in a 3lb average weight bird. We sell live birds and offer custom slaughter.
See the Sale Page for pricing and ordering.
Chick hatching on the farm – our homemade hatcher in use
Since we decided to get a little more serious about hatching chicks this year, we needed to increase our capacity. Chicks require a 21 day incubation period. We prefer to use an automatic turner in the incubator to eliminate the need to manually turn eggs 3-4 times a day. On day 18, you put the eggs on “lockdown” which means removing the turner and letting the eggs sit still until they hatch. While a basic still air incubator is made of styrofoam and doesn’t have a fan works fine for the entire cycle, it is actually limited to about 25 days. That’s because the nominal 21 day incubation results in some hatches out to about day 23. Then you have to clean it out, reload, etc.
For the initial part of the incubation period, the humidity is kept around 40%. From lockdown on, it needs to be around 75%. A limitation of the still air incubator is they don’t do well at trying to raise the humidity.
Our solution was to move the eggs to a different location to hatch. That means the incubator with automatic turner stays in operation. Now at day 18, eggs go into the hatcher and the incubator gets new eggs. Since we are running 2 incubators with turners, we have 41 eggs going to hatch every 9 days (once the cycle is in progress).
Here is our homemade chick hatcher. It has undergone a few different modifications, but I think the design has stabilized for a while.

The hatcher is made from an old beer fridge I got from a bar (for free). The compressor was no good, so I removed the compressor and cooling coils.

I reversed the polarity of the fan so it draws air up through the unit instead of blowing on the top shelf. I also added a rheostat to make it a variable speed fan.
 I kept the fluorescent light so we can see the chicks hatching. Since the bar planned to reuse the shelves in a new unit, I made shelves out of 2x2s and wire mesh. Since I took these pictures, we did change to a basket setup instead of the cat litter boxes so the air circulates better.
 I installed a floor air conditioning register in the side to allow for fresh air to enter the unit as the chicks hatch. The cables you see going in are for the digital thermostat and humidistat. You can see the small controller on the side in the first picture (it is blue). The digital controller was $70, but absolutely worth the improvement.
 The heat source is a 125 Watt heat lamp that I wired into the bottom. We are using a humidifier in the bottom to keep the humidity in the appropriate range. The digital controller regulates the temperature within about 1 degree and the humidity within about 5%.
The total cost of materials was about $100 and the end result is a hatcher that gives up plenty of room to increase production in the future and we got an 80% hatch rate out of our last batch of eggs. Using a still air incubator, our best ever was about 60%.
Every weekend should be 4 days
2 day weekends are junk. There is hardly enough time to really get started on anything, let alone complete a project. If we always had Friday to get ready for the projects, and Monday to wrap them up, we would get a lot more accomplished around here. Instead, Friday I was at work (all day) and then loaded the barn with hay after I got home.
Anna did some running around on Saturday morning, so I was basically inside watching kids. I did help with some cleaning in the house.
Saturday night was date night at the Dolphin Scholarship Auction. It was a lot of fun and we even bought a couple of things for ourselves (including a wine tasting at Jonathon Edwards Winery just around the corner from our house).
We had chicks hatching this weekend, unfortunately, the results were quite poor. I recently completed build a new hatcher for the chick operations. This was the first batch to hatch inside, and we discovered some design flaws. Monday night is overhaul for the hatcher because the next batch will move in for hatching on Tuesday.
2 rabbits had litters on Saturday and we have 9 new additions to the rabbitry. That’s actually low because 1 doe had 11, but only 2 survived. We are not sure what the issue was, so we will be monitoring her performance carefully on the next litter. You know what they say about meat rabbits: you can always eat the mistakes.
Sunday morning was spent working on some chores/cleanup around the farm until Alex and I went to the Blue and Gold Banquet for Cub Scouts where Alex received his Bear rank. We also had 2 customers over today for buying chicks. I love having other people who are interested in the self-sustaining movement out to our farm, and while they might show up to buy chicks, we end up talking about goats, rabbits, vegetables, and everything else.
Tonight was project time on the whizbang chicken plucker. It should be complete in another day or so and then we will give it a test run. I plan to have video of the first use.
See what I mean? 2 days didn’t hardly get anything done.
a productive afternoon
The power was out at work this morning, so I came home at lunch. Of course, I got the call that the power came back when I was within a mile of the house. No worry, I still took the afternoon off to work with Anna on stuff around the farm. We had our lunch and once Amanda was down for a nap, we got to work outside.
Last year, the garden consisted of 3 raised beds inside a fenced in area. It was pre-existing, so we just added some compost and used it like that. Our total planting area was about 130 sqft. Today, we removed the raised beds, put down a layer of cardboard to kill grass and weeds, then added about 8″ of compost on top of the cardboard. We reused the boards from the raised beds to go around the fence and hold the soil inside the garden. We now have about 300 sqft of planting space ready to go.
After that, the kids got home, Anna went jogging, and I kept working. I built a new coop for raising young chickens. I should be able to finish it up tomorrow afternoon with another hour or so of work. Of course, I also have to get to work prepping more rabbit hutches, because we are picking up 3 more rabbits on Sunday. We anticipate 2 will be dinner in the next week or two and 1 will be retained for breeding with our New Zealand does.
Thanks to a tip I got this morning, we have decided on our Oberhasli buck. Well, sort of. We decided on a farm that has a lot of Oberhasli’s and we sent in a deposit to reserve a buckling that should be born in March. I’ll pick him up from Maryland in May when I go to DC for business.
Baby chicks
This past weekend marked the first hatch of 2012 chicks on the farm. We have over 20 chicks that survived the hatch. The number isn’t final because some may still hatch and some may not survive. We are continuing to learn about hatching chicks. Right now, we are hatching with the intent to sell the chicks.